Create and edit groups

Aim

To give groups of users identical rights, for instance, permission to view your session live or to review it after it has been recorded. As a Trainer you can, for instance, create groups of students (Trainees).

Prerequisites

Your user role (Technician, Administrator, Trainer) allows creating groups.

Procedure

  1. Click the menu button and choose Groups.
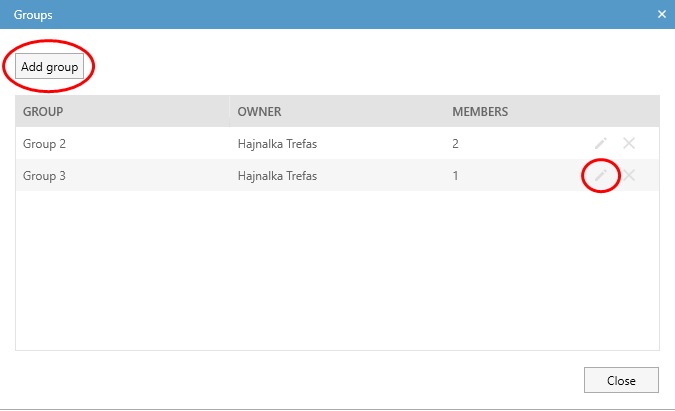
  2. If you wish to create a new group, click Add group and enter a name for the group of users. If you wish to edit an existing group, click on the editing icon in its row.add edit group.jpg
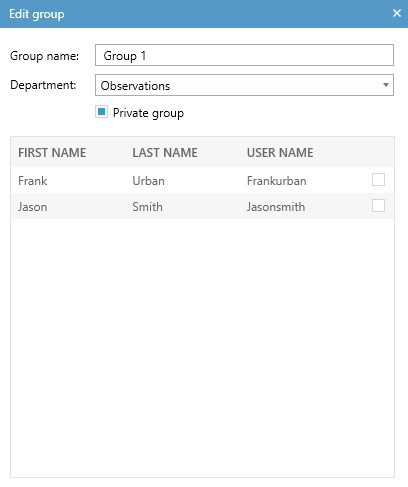
  3. Select whether the group is private or not. If you want, for instance, Trainer B to see your groups, make the groups public (leave the Private group checkbox unselected) and make Trainer B a group member. Trainer B can then invite your groups to view his/her sessions.
  4. Select the Department where your group will belong. If you do not select a department, you will not be able to add members to the group!
  5. From the list of users within the chosen Department, select the ones you want to add to the group, using the checkboxes. Please note the following:
    •  As an Administrator or Trainer, you will only see the users of your own department
    •  As an Administrator, you will not be able to add yourself to a public group; however, you can remove yourself from such groups, if you have been previously added. If you wish to be added to a public group, you will need to ask a Technician. Please note, however, that Technicians can only add users to a public group from the same department. 
  6. Click Save.group department.jpg

NOTE To give other users rights, for instance, to view your session live or to review it afterwards, you have to invite them, please see Invite participants.

NOTE As a Trainer, you cannot edit the public groups created by other users; however, you can use these.