# Prepare session recording
# Locations and Sessions
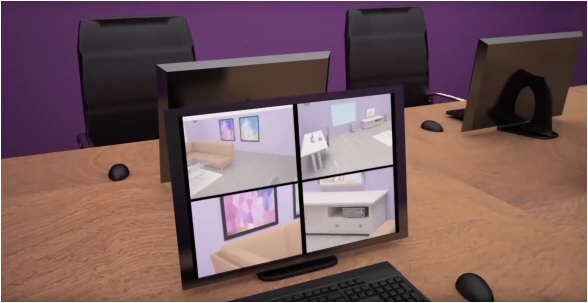
By default, a session is a recording with all cameras in one location. To create sessions, your user role must allow session recording.
[](https://bookstack.noldus.com/uploads/images/gallery/2023-12/N8TA0o8bwK69tGMM-image.png)
## Main topics
- [Pan, Tilt, and Zoom](https://bookstack.noldus.com/link/720#bkmrk-page-title) (PTZ) the cameras. This is only possible if the camera has Pan, Tilt, and Zoom control.
- [Save PTZ presets](https://bookstack.noldus.com/link/721#bkmrk-page-title)
- Change the [Video layout](https://bookstack.noldus.com/link/722#bkmrk-page-title)
- [Change Audio source and volume in preview](https://bookstack.noldus.com/link/723#bkmrk-page-title)
- Use [Talk to people in location](https://bookstack.noldus.com/link/724#bkmrk-page-title) to talk to the persons in the location.
- [Specify a default session name](https://bookstack.noldus.com/link/725#bkmrk-page-title)
- [Create and edit groups](https://bookstack.noldus.com/link/726#bkmrk-page-title) to view the session.
# Pan, Tilt, and Zoom
### aim
Pan, Tilt and Zoom the camera to obtain a proper view of the subjects under study.
### prerequisites
- Your user role allows session recording (Technician, Administrator, or Trainer).
- You have opened a location.
See [Select locations for recording](https://bookstack.noldus.com/link/735#bkmrk-page-title)
- The camera can Pan, Tilt, and Zoom. Ask your colleague who manages the Viso set-up whether this is the case.
See [Select locations for recording](https://bookstack.noldus.com/link/735#bkmrk-page-title)
### procedure
1. Open the location.
See [Select locations for recording](https://bookstack.noldus.com/link/735#bkmrk-page-title)
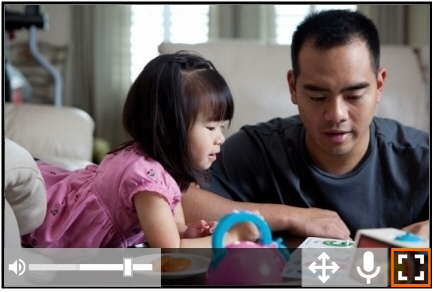
2. Hover with your mouse over the camera image. The toolbar appears at the bottom of the image.[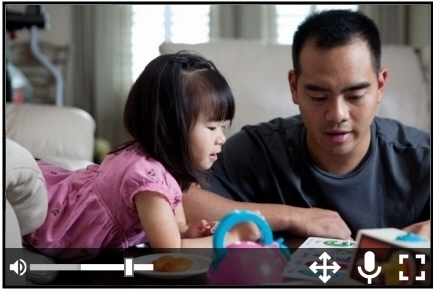](https://bookstack.noldus.com/uploads/images/gallery/2023-12/Fq77PKR97Y19X3v9-image.png)
3. Click the PTZ button to enable or disable PTZ control.
[](https://bookstack.noldus.com/uploads/images/gallery/2023-12/T0w5YNpyd8i4wLJQ-image.png)
4. PTZ control appears in the middle of the image and your mouse pointer becomes a small point. Click the camera image and keep your left mouse button pressed to control the camera. The camera image moves in the direction of the point. The further away from the PTZ control you click, the faster the camera moves.
[](https://bookstack.noldus.com/uploads/images/gallery/2023-12/ppANQup8M7tqZF5H-image.png)
5. Zoom in and out with your mouse wheel.
See also [Save PTZ presets](https://bookstack.noldus.com/link/721#bkmrk-page-title)
**NOTE** See [Record sessions](https://bookstack.noldus.com/link/767#bkmrk-record-sessions) in [Keyboard shortcuts](https://bookstack.noldus.com/link/767#bkmrk-page-title) how to manage the PTZ menu with your keyboard.
# Save PTZ presets
### aim
To save the new camera view so that you can return to it easily.
### prerequisites
nYour user role allows session recording (Technician, Administrator, or Trainer).
nYou have opened a location.
See [Select locations for recording](https://bookstack.noldus.com/link/735#bkmrk-page-title)
nThe camera can Pan, Tilt, and Zoom. Ask your colleague who manages the Viso set-up whether this is the case.
See [Select locations for recording](https://bookstack.noldus.com/link/735#bkmrk-page-title)
### procedure
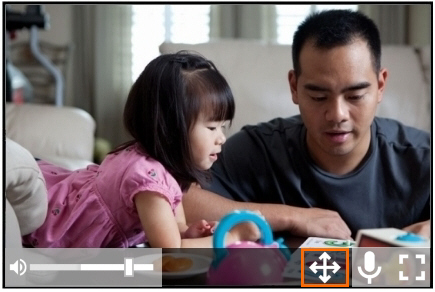
1. Hover with your mouse over the camera image and click the PTZ button on the toolbar.
[](https://bookstack.noldus.com/uploads/images/gallery/2023-12/T0w5YNpyd8i4wLJQ-image.png)
This opens the PTZ preset menu. The buttons shown below appear.
[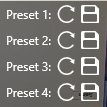](https://bookstack.noldus.com/uploads/images/gallery/2023-12/66z8dlSmLbSeTKmF-image.png)
2. To save a camera position, click one of the save buttons.
[](https://bookstack.noldus.com/uploads/images/gallery/2023-12/iDsVuIT5hGUrNFDe-image.png)
##### To return to a PTZ preset
Click one of the arrows to return to a PTZ preset.
[](https://bookstack.noldus.com/uploads/images/gallery/2023-12/e3sXLCrw28dxzpQ0-image.png)
##
**NOTE** The PTZ presets are stored per location. So if you or another user opens a location with Viso on another computer, the same pr esets are present. You can store four presets per location.
**NOTE** See [Record sessions](https://bookstack.noldus.com/link/767#bkmrk-record-sessions) in [Keyboard shortcuts](https://bookstack.noldus.com/link/767#bkmrk-page-title) how to manage the PTZ menu with your keyboard.
# Video layout
### aim
To choose the position of your videos on your screen.
**IMPORTANT** The changes do not affect the recordings. The cameras and video resolutions are selected by your colleague who manages the Viso set-up. All available cameras will always be used for recording.
### prerequisites
- Your user role allows session recording (Technician, Administrator, or Trainer). Alternatively, you are invited to view the session.
- You have opened a location.
See [Select locations for recording](https://bookstack.noldus.com/link/735#bkmrk-page-title)
### procedure
First, open the location.
[Select locations for recording](https://bookstack.noldus.com/link/735#bkmrk-page-title)
To change the order of videos
Drag and drop videos to change their position on your screen.
To show one video full size
Do one of the following:
- Double-click it.
- Press **Ctrl+Shift+\[video number\]**. If you do not know the video number, open the **View Settings** pane (see next step). The video number is superimposed on the video image.
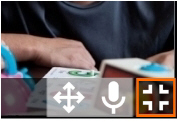
- Hover over the camera image and click the **Full size** button on the toolbar that appears.
[](https://bookstack.noldus.com/uploads/images/gallery/2023-12/OirBRSJjy5Z4gEV9-image.png)
To display the previously shown videos again, do one of the following:
- Press **Esc**.
- Double-click the video.
- Press **Ctrl+Shift+\[any video number\]**.
- Hover over the camera image and click the **Restore** button on the toolbar that appears.
[](https://bookstack.noldus.com/uploads/images/gallery/2023-12/6TXqj4VNjNR4VInd-image.png)
#### To show/hide videos and to change the distribution of the videos on your screen
1. Click the settings wheel on the toolbar to open the **View Settings** pane. Here you can change the way the videos are displayed.
[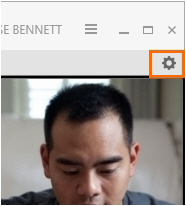](https://bookstack.noldus.com/uploads/images/gallery/2023-12/HRIl9liSNawbpxfh-image.png)
2. If the location has more than one camera, the video numbers are superimposed on the video images when you open the **View settings** pane. Optionally click a video number in the **View settings** pane to hide a video. This does not disable recording that video. Click the video number once more to show it again.
[](https://bookstack.noldus.com/uploads/images/gallery/2023-12/IdmnLzv9qKCBfXVD-image.png)
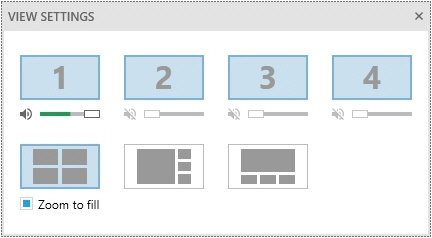
3. Optionally, change the layout of the videos on your screen. You have the following options:
[](https://bookstack.noldus.com/uploads/images/gallery/2023-12/eKkavTZIevATZUW3-image.png)
The space where videos are displayed divided in equal parts.
[](https://bookstack.noldus.com/uploads/images/gallery/2023-12/OXsqEWwAisOqMHna-image.png)
One large video with the other ones displayed smaller at the right-hand side.
[](https://bookstack.noldus.com/uploads/images/gallery/2023-12/9l3R766aXHwztO55-image.png)
One large video with the other ones displayed smaller at the bottom.
4. By default all videos are zoomed to fill the available space completely. To disable this, deselect **Zoom to fill**.
##
**NOTE** By default Viso divides the space where videos are shown in equal parts. If you have one video, it uses the full available space. If you have two videos, the available space is divided in two halves next to each other. if you have three or four videos, the available space is divided in four equal parts.
**NOTE** The size of the displayed videos depends on whether you selected **Zoom to fill** and also on the video resolution set by your colleague who manages the Viso set-up. If the video resolution differs between videos, and you did not select **Zoom to fill**, they may not have equal size in the video layout.
Zoom to fill may cause the sides of the video to disappear. These sides are recorded, but in the **Zoom to fill **these disappear. If you want to see the sides, deselect **Zoom to fill**.
# Change Audio source and volume in preview
### aim
To select which audio source to hear in Viso and to adjust the volume. By default you hear only the audio from the first camera.
IMPORTANT The changes do not affect the recordings. Microphones and audio volumes for the recordings are selected by your colleague who manages the Viso set-up. All available audio sources will always be recorded.
### prerequisites
- Your user role allows session recording (Technician, Administrator, or Trainer). Alternatively, you are invited to view the session.
- You have opened a location.
See [Select locations for recording](https://bookstack.noldus.com/link/735#bkmrk-page-title)
### procedure
1. Open the location.
See [Select locations for recording](https://bookstack.noldus.com/link/735#bkmrk-page-title)
2. Hover over a camera image. A toolbar appears at the bottom of the camera image.
[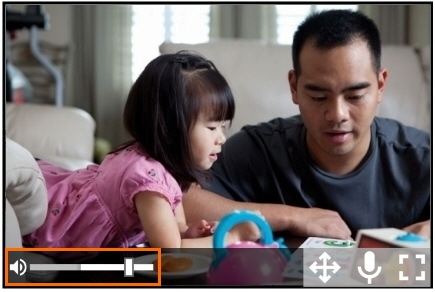](https://bookstack.noldus.com/uploads/images/gallery/2023-12/041WtkDw5mksYdYt-image.png)
3. Click the speaker symbol under a camera number  to mute or unmute the audio from that source. Move the slider to adjust the volume.
##
**NOTE** If no speaker symbol or volume slider appear, your colleague who manages the Viso set-up did not select audio for this video source.
**NOTE** If the same audio source is selected for all cameras, mute/unmute will apply to all of them together.
# Talk to people in location
### aim
To talk to the people in the location through the camera speaker. This is, for example, useful if you want to tell the test participants where to be seated, or when to start the test.
### prerequisites
- Your camera has a speaker and allows push-to-talk. Ask your colleague who manages the Viso set-up if the push-to-talk option is available in your locations.
- You have a microphone connected to the computer with Viso, or your computer has a built-in microphone.
- Your user role allows session recording (Technician, Administrator, or Trainer).
- You have opened a location.
See [Select locations for recording](https://bookstack.noldus.com/link/735#bkmrk-page-title)
### procedure
1. Open the location.
See [Select locations for recording](https://bookstack.noldus.com/link/735#bkmrk-page-title)
2. Hover with your mouse over a camera image. The toolbar appears at the bottom of the image. It contains the push-to-talk button if the camera has a speaker and allows push-to-talk.
[](https://bookstack.noldus.com/uploads/images/gallery/2023-12/4r3OWuPkIbPxGY8O-image.png)
3. Click and hold the push-to-talk button and speak through the microphone. The persons in the location should now hear you. Keep the button pressed while you speak.
# Specify a default session name
### aim
To set a default name for your sessions. Your sessions will be saved with the default name, followed by a consecutive number.
### prerequisite
- Your user role allows session recording (Technician, Administrator, or Trainer).
### procedure
1. Click the **Menu button** at the top of the Viso window and choose **Settings > Default Session name**.
[](https://bookstack.noldus.com/uploads/images/gallery/2023-12/liV7wV90ToNFxLjK-image.png)
2. Select **Save session with a default name** and enter a name in the **Default name** field.
[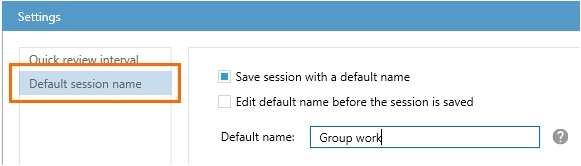](https://bookstack.noldus.com/uploads/images/gallery/2023-12/k1V0sLTSsUf9jUKi-image.png)
3. Optionally, select **Edit default name before the session** is saved. This way you can give the session another name than the default one with a consecutive number. This is, for example, useful if you want to add the name of the subject to the session name.
# Create and edit groups
### aim
To give groups of users identical rights, for instance, permission to view your session live or to review it after it has been recorded. As a Trainer you can, for instance, create groups of students (Trainees).
### prerequisites
Your user role (Technician, Administrator, Trainer) allows creating groups.
### procedure
1. Click the menu button and choose **Groups**.
2. If you wish to create a new group, click **Add group** and enter a name for the group of users. If you wish to edit an existing group, click on the editing icon in its row.[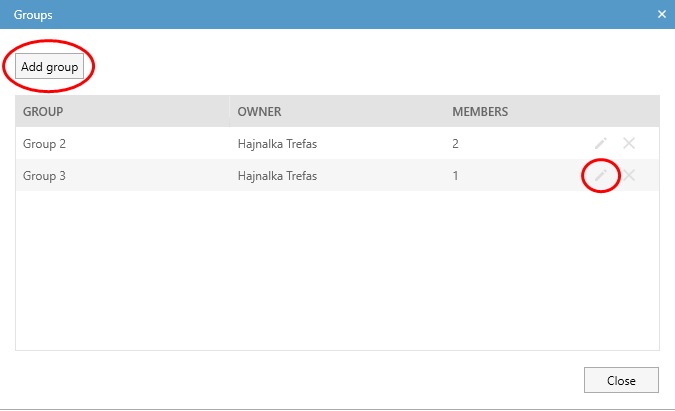](https://bookstack.noldus.com/uploads/images/gallery/2024-02/3pGr4fSv0QGyXqju-add-edit-group.jpg)
3. Select whether the group is private or not. If you want, for instance, Trainer B to see your groups, make the groups public (leave the **Private group** checkbox unselected) and make Trainer B a group member. Trainer B can then invite your groups to view his/her sessions.
4. Select the **Department** where your group will belong.
5. From the list of users within the chosen Department, select the ones you want to add to the group, using the checkboxes. For multiple selection, use the Ctrl or the Shift key the usual way and then press the space key. It will change the status of the checkboxes of all the selected users. When you wish to remove users from a group, follow the same steps and uncheck the relevant boxes. Please note the following:
- As an Administrator or Trainer, you will only see the users of your own department
- As an Administrator, you will not be able to add yourself to a public group; however, you can remove yourself from such groups, if you have been previously added. If you wish to be added to a public group, you will need to ask a Technician. Please note, however, that Technicians can only add users to a public group from the same department.
6. Click **Save.**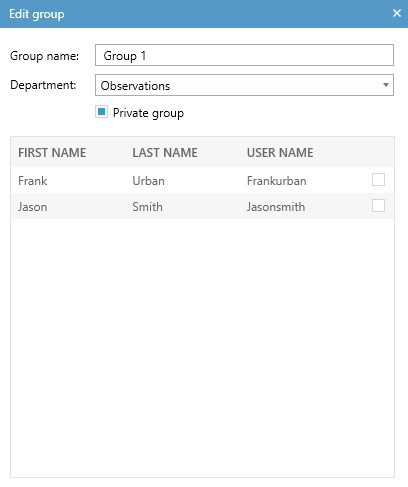
**NOTE** To give other users rights, for instance, to view your session live or to review it afterwards, you have to invite them, please see [Invite participants](https://bookstack.noldus.com/link/727#bkmrk-page-title).
**NOTE** As a Trainer, you cannot edit the public groups created by other users; however, you can use these.
# Invite participants
### aim
To give other users permission to view your session live and to review it afterwards.
### prerequisite
Your user role allows session recording (Technician, Administrator, or Trainer).
### procedure
1. To invite a participant or group of participants to view a session while it is recorded, select the location or locations.
See [Select locations for recording](https://bookstack.noldus.com/link/735#bkmrk-page-title). Continue with step 2.
To invite a participant or group of participants to view a recorded session, open the **Sessions** tab. Double-click the session. Continue with step 2.
2. Open the **Participants** pane at the bottom-left of your window.
3. Click the checkbox next to a participant name or group name to send an invitation.
[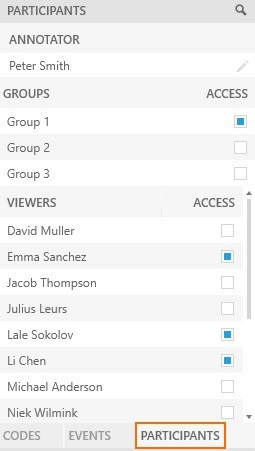](https://bookstack.noldus.com/uploads/images/gallery/2024-02/kjfFYLFgyKiaxwb1-invite-group.jpg)
### To open a session upon an invitation
The invited participants receive an invitation message with which the session can be opened. The dashboard of the invited users also lists the session. A participant that is invited to view a session recording can also review it afterwards.
[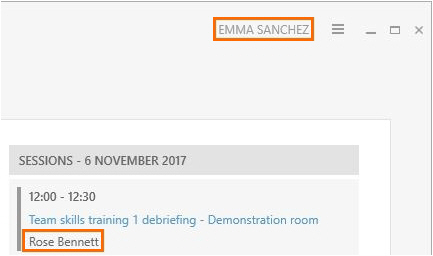](https://bookstack.noldus.com/uploads/images/gallery/2023-12/ZoIVnHTOjOk5H7jg-image.png)
### Invitations for multiple-location sessions
How participants are invited and what they can view differs between separate sessions and composite sessions.
#### Separate sessions
Each location results in a separate session. Therefore, a session invitation gives access to one location only. It is possible to invite different participants in different locations. The invited participants can view only that location, also if the user that records the session closes it and opens another one.
#### Composite sessions
The recordings in all locations are combined in one session. An invitation for a composite session gives access to all locations in that session.
During session recording, invited participants see the location that is open on the screen of the user that records the session. If the user that records the session switches locations, the invited participants will also see the new location.
During session playback, the invited participant can browse through all the locations of the composite session with the carousel control.
## Notes
- To search participants, click the search button at the top of the Participants pane. Enter text in the search field.
[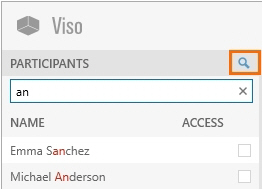](https://bookstack.noldus.com/uploads/images/gallery/2023-12/2bH3OjjSaybBtTrz-image.png)
- To withdraw a session invitation, open the **Participants** pane and deselect the checkbox next to the name.
- Scored [Markers ](https://bookstack.noldus.com/link/745#bkmrk-page-title)and [Remarks](https://bookstack.noldus.com/link/747#bkmrk-page-title) are not shown if you view a session live while it is being recorded by another user. They are shown if you review a previously recorded session. You must have [The Annotation Module](https://bookstack.noldus.com/link/743#bkmrk-page-title) to score and view markers and remarks.
- Once the recording is stopped, the invited user is not able to view the location anymore. However, he or she can review the recorded session.