Annotations
- The Annotation Module
- Annotation Module, important terms
- Create Codes Lists
- Annotate
- Enter a remark
- View annotations
- Playback events
- Edit scored subjects, markers and remarks
- Select another Codes list
- Change the annotator
- Reclaim the role of annotator
- Customize the Session window
- Export annotations to text file
- Highlight videos
The Annotation Module
If your Viso license includes the Annotation Module, you can mark events that are of interest for your study. For example, in a classroom, the onset of the Instruction phase, and Group work phase. Optionally, link markers to subjects, for example to mark a question by the teacher and the answer by a student. Markers specify a moment, and have no duration.
Mark events during session recording, or while reviewing it. To annotate, first enter the key code of the subject and then the one of the marker. Use the scored markers to jump to an episode of interest. This is especially useful to debrief certain episodes.
Optionally, you can assign the role of annotator to a colleague or one of your students.
The Annotation Module also allows you to enter free text as remarks while the session is being recorded. This is useful if something happens during the observation that you did not define as a marker beforehand. For example, if another teacher enters a classroom while you record group work by the pupils.
Using the Annotation Module, you can also create highlight videos which summarise the most interesting point events of your sessions to be used e.g. in presentations or lectures. To these highlight videos, you may add your markers and remarks as subtitles.
Viso in combination with The Observer XT
Videos from sessions recorded with Viso can be opened in the annotation software The Observer XT. Scored subjects, markers and remarks can be imported into The Observer XT to further analyze the session. Of course it is also possible to create a coding scheme and further annotate the sessions for more advanced analyses.
See Viso with The Observer XT.
Annotation Module, important terms
Subjects
Subjects are the individuals in your study. Define subjects if you are interested in different behaviors for different persons or animals. For example if you observe teaching skills for teachers and work attitude for students.
Since it is likely that you study different individuals in each session, do not define the names or identities as subjects, but define the roles. So define Teacher and Student instead of Mr. Jones and Mark.
You do not have to score subjects. If you mark only episodes and general events in your test, for example Test 1, Test 2, or Instruction Phase and Test phase, do not define subjects. Also do not define subjects if you observe only one individual in each session. You cannot score subjects only.
Markers
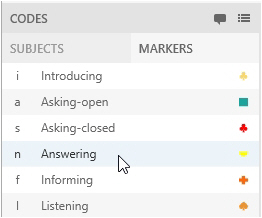
With Markers you can mark events that are of interest for your study. Markers mark a moment in time and have no duration. Use a marker to mark the start of a phase in your study, or the start of a behavior of your test persons or animals. Examples or markers are start of Open question by a therapist and Answer by a client, or Instruction by the teacher and Work in parallel for students. Examples of markers without subjects are Start of test 1, or Start of counseling session
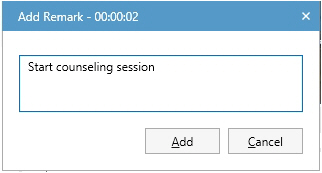
Remarks
With a remark you can enter information as free text if something unexpected happens that you did not define as a marker beforehand. Like with markers, you can only enter a remark if you are logged in.Your user account must include the rights to enter remarks (Technician, Administrator, Trainer). Remarks are not connected to a subject. If you want to connect the unexpected event to a subject, add a marker instead.
Codes list
Subjects and markers are organized in codes lists. This makes it easy to select the correct codes for your specific session. For example you can make two different codes lists for a parent-child observation and for a classroom observation. A codes list can contain maximally 36 subjects and 36 markers, so for each category you can use all letters and numbers on your keyboard. You can make as many codes lists as you want, but you can only use one codes list per session.
You can only create codes lists and annotate if you are logged in.Your user account must include the rights to create codes lists (Technician, Administrator, Trainer).
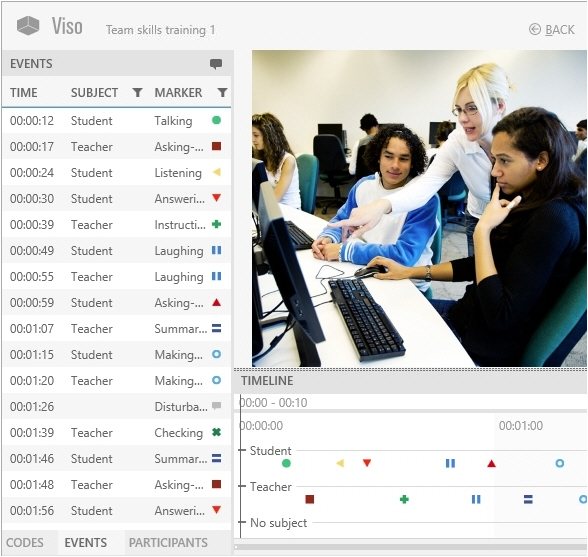
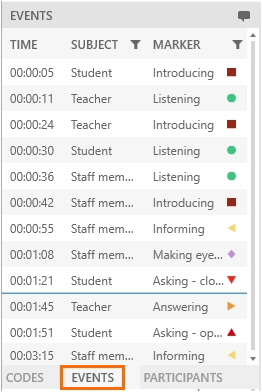
Event log
The Event log is your record of the scored Subjects, Markers and Remarks in your Session.
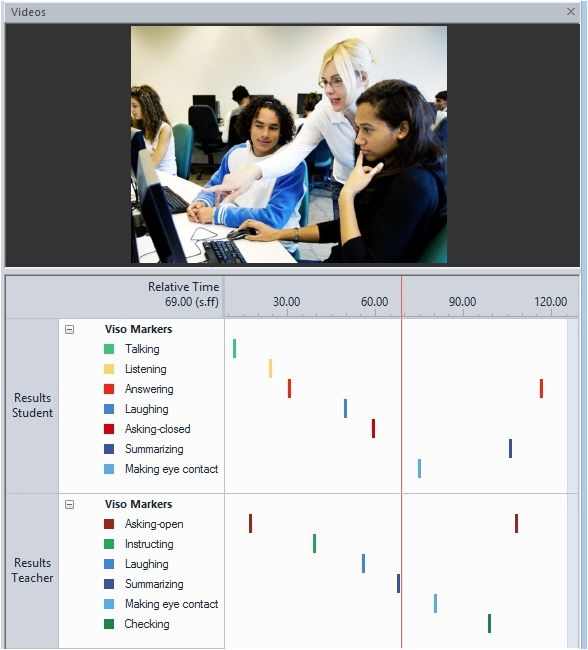
Timeline
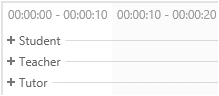
In the Timeline the scored events and remarks are plotted against time.
Annotator
The person who has the right to annotate a session. By default, the annotator is the person who recorded the session. This person can assign the role of annotator to a colleague or a student or reclaim the role of annotator. The annotator can make his or her own Codes list or use an existing Codes list. Trainees can only use existing Codes lists. If you transfer the ownership of a session to, for instance, your colleague, he/she will automatically be assigned as the annotator of the session. Changing the annotator of a session does not automatically change the owner.
Highlight video
When creating Highlight Videos, you can export sections of your sessions with point events of special interest, potentially adding subtitles created from Markers or Remarks. You may export these point events of special interest individually or merged into a single video file.
Create Codes Lists
aim
To specify the events of interest for your study. Subjects and markers are organized in codes lists. Each list can contain maximally 36 subjects and 36 markers.
prerequisites
- Your license includes the Annotation Module.
- Your user role allows creating codes lists (Technician, Administrator, or Trainer).
procedure
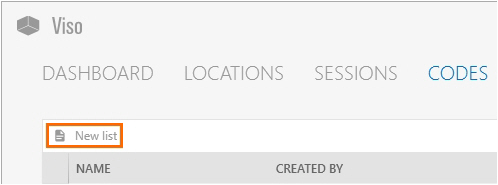
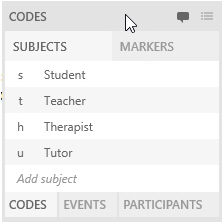
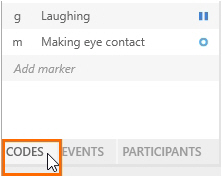
- Open the Codes tab.
- Click New List.

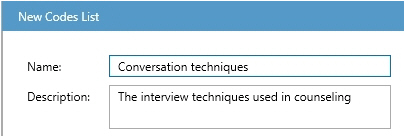
- Name the list and, optionally, add a description.

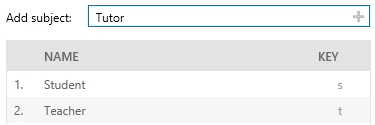
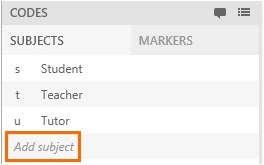
- Optionally, add subjects by entering them in the Add subject field and clicking the + button, or pressing the Enter key.

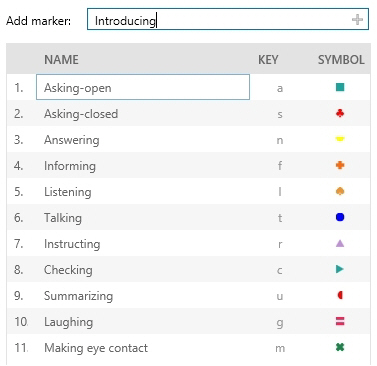
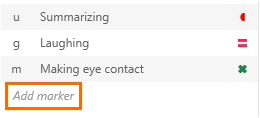
- Add markers by entering them in the Add marker field and clicking the + button, or pressing the Enter key.
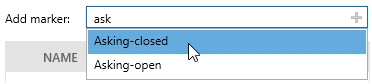
If you already created other codes lists, the name of similar elements appear if you enter the first letter in the Add subject or Add marker field. Select the subject or marker you want to add to the list.
Notes
- New subjects automatically get a key code. New markers automatically get a key code, shape and color. Within one list, a key code can only be used once. The key code is by default the first letter from the subject or marker name that has not been used for other markers in the same list yet. You can change the key code, shape and color manually.
- To change the order of subjects and markers in the codes list, drag and drop them.
- Codes lists cannot be edited, to ensure that they contain the same markers in all the sessions in which you use this list. You can duplicate and then edit a list and save it with another name. To do so, right-click a list in the Markers tab and select Copy and edit.
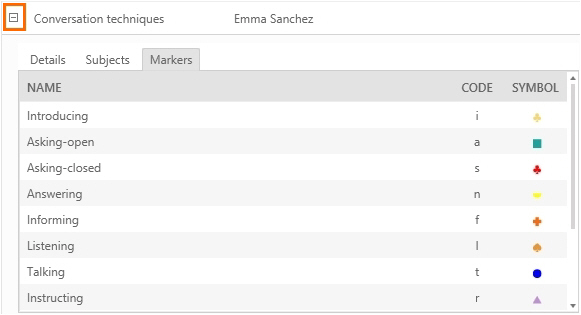
- To view details of a Codes list, open the Codes tab and click the + button in front of it to unfold the item.
Annotate
aim
To score markers during session recording, or afterwards while playing the recorded session back.
prerequisites
- Your license includes the Annotation Module.
- To annotate during session recording, your user role allows recording (Technician, Administrator, or Trainer).
- To annotate a session while playing it back, you recorded the session, received session ownership or have been assigned as the annotator.
To annotate during session recording
procedure
- Open a location.
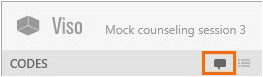
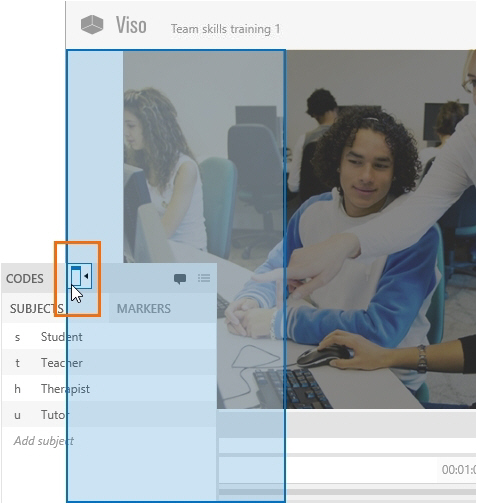
If you selected multiple locations, use the carousel control to open the location. See To open locations with the carousel control. - Click on Codes in the lower-left corner of your screen to open the Codes tab.

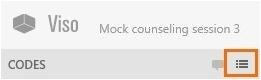
- Click this button and select the correct list. This is possible until you score the first Subject or Marker.
- Optionally pan, tilt, or zoom the cameras and select which microphones to hear in the preview.
See Select locations for recording - Start recording.

- Annotate by clicking the subjects (optional) and markers in the Codes window or by pressing the associated keys on the keyboard.
If you defined subjects, score the subject first and then the marker. As soon as the subject is scored, the Markers tab in the Codes window opens so you can score the marker. The moment the subject is scored is recorded as timestamp.
To score markers without a subject, open the Markers tab manually in the Codes window, or press Ctrl + /. Then score the marker.
If you did not define subjects, score the markers either in the Codes window, or with the keys on your keyboard.

See also Annotations in a multiple-location recording
To add codes during session recording
IMPORTANT The added subjects and markers are saved for the present session only. They are not stored in the Codes list for future sessions.
If you have a multi-location recording and selected Separate sessions, the codes are stored for the session that is open on your screen only.
procedure
- Subject - open the Subjects tab and click Add Subject. Enter a name and accept the default keycode or choose another one.

- Marker - open the Markers tab and choose Add Marker. Enter a name and accept the default keycode and symbol or choose other ones.

How annotations appear
The scored annotations appear in the Event log and the Timeline.
Event log
To view the Event log, open the Events pane at the bottom-left side of your window.
Timeline
In the Timeline, the events are plotted against time. Subjects are listed vertically. The markers are displayed horizontally on the Timeline. During session recording, the subjects are shown in the order they were scored, the last subject scored is shown at the top. While reviewing, the subjects are shown in the same order as in the Codes list.
If markers were scored without subject, the markers are displayed in the row No Subject in the Timeline. Remarks are also displayed in the No Subject row.

To annotate after session recording
procedure
- Open a recorded session (see Review sessions) and play it. This locks the session for other users, who can now only view the session and cannot score markers.
If you have a multiple-location recording, use the carousel control to open the location you want. See To open locations with the carousel control.
- Click on Codes in the lower-left corner of your screen to open the Codes tab.
-
If you did not select a Codes list during session recording, click this button to select one. Also use this button to change the codes list. This is possible until you score the first marker.

-
Annotate, following the same procedure as in Annotate.
During session playback you can only score subjects and markers from the same list that you used during session recording. However you can add subjects and markers for this session. See To add codes during session recording -
To save changes before you exit the session, press Ctrl +S. The markers are also saved if you exit the session

NOTE You can select codes lists created by others, but you can only annotate your own sessions, the sessions for which you received ownership or annotator rights.
NOTE Others cannot view scored markers and remarks when you are recording and annotating a session.
NOTE Others can view the scored markers and remarks when a recorded session is edited. To do so, open the Sessions tab and open the session. The markers and remarks appear when the person that edits the session saves it (Ctrl + S).
Annotations in a multiple-location recording
If you selected multiple locations, it depends on whether you Select multiple locations to record separate sessions for each location or Select multiple locations to record a composite session how annotations are stored. Annotations are linked to the sessions, not to the location. See below for the difference.
Separate sessions
Each session has its own annotations. This means that you can annotate the separate sessions differently. The annotations are stored for the location you have open on your screen while you are annotating. Codes you add during session recording will be added to codes list of the session that is open on your screen only.
Composite session
The composite session will have one Event log. The Event log for the different locations is the same, independent from which location is open on your screen. You can open another location and continue with the same Event log. All annotations are stored in the same Event log. Codes you add during session recording are added to the codes list of all locations.
If the user that records a composite session switches locations, a Remark is added to the Event log with the Location name. The Remark has the timestamp the new location has opened.
If you do not have the Annotation Module, no Remark is added when you change locations during recording.
Enter a remark
aim
To mark something of interest that you did not define in the Codes list. This can be done during session recording or afterwards while playing the session back.
prerequisites
- Your license includes the Annotation Module.
- To add remarks during session recording, your user role allows recording (Technician, Administrator, or Trainer).
- To add a remark while playing a session back, you recorded the session, received ownership or annotator rights for the session.
Remarks in a multiple-location recording
If you selected multiple locations, it depends on whether you Select multiple locations to record separate sessions for each location or Select multiple locations to record a composite session how annotations are stored.
Separate sessions
The remarks are added to the session that is open on your screen only.
Composite session
Since all locations have the same Event Log, the remarks are added to all locations.
procedure
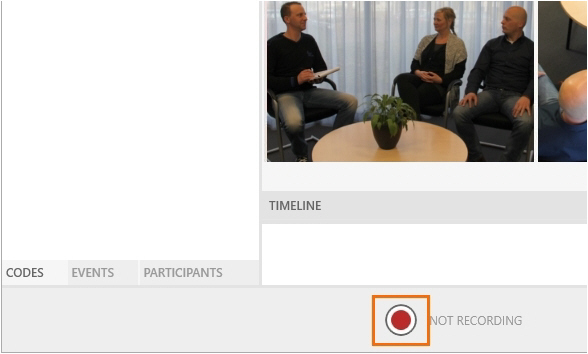
- Click this button, or press Ctrl + R.

- Enter the text and click Add.


NOTE A remark with the location name is added when you switch locations in a composite session.
View annotations
aim
To view the annotations from a session recorded by someone else.
prerequisites
- Your license includes the Annotation Module.
- You either have rights to view the session (Technician, Administrator), you created the session (Trainer), you have received ownership or annotator rights or you are invited to view the session.
- The session has been recorded.
procedure
- Open the Sessions tab.
- Double-click a session to open it.
- Play the session.
The annotations are shown in the Event log and the Timeline
Event log
To view the Event log, open the Events tab at the bottom of your window. To jump to an event in the Timeline and videos, click it in the Event log.
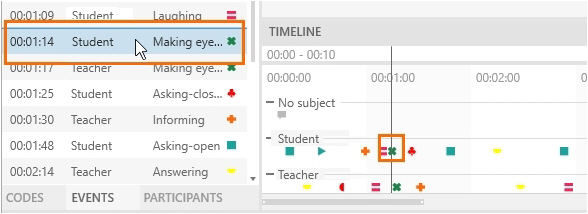
Timeline
- To jump to an event in the videos and Event log, click it in the Timeline.
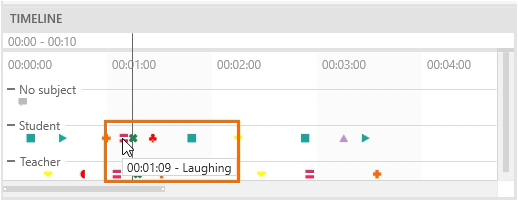
- To display an event, hover over a symbol.
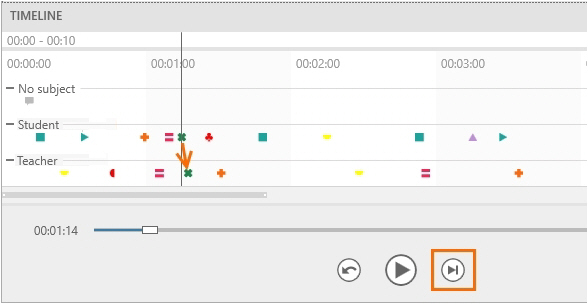
- To move to the next event, click the Skip to next event button or press Ctrl + right arrow on your keyboard.

- To move to the previous event press Ctrl + left arrow on your keyboard.
- To zoom in and out the Timeline, hover with your mouse cursor over the Timeline and use your mouse wheel.
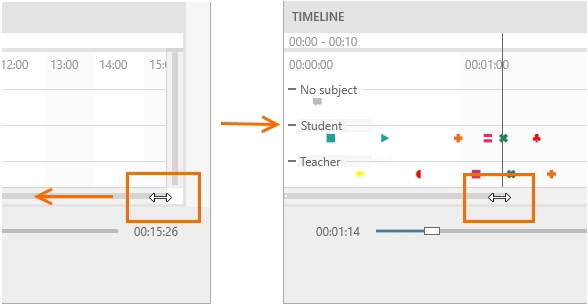
- To view an interval in detail, drag the borders of the line below the Timeline.

Playback events
If you want to play back a specific event, set a pre-roll interval to start playing a few seconds prior to the event.
The default pre-roll interval is 5 seconds. The maximum duration you can set is 15 seconds.
Edit scored subjects, markers and remarks
aim
To correct annotation errors.
prerequisites
- Your license includes the Annotation Module.
- Your user role allows session recording (Technician, Administrator, or Trainer).
- If you have the user role Trainer, you created the session, received ownership or annotator rights. Trainees can also receive ownership or annotator rights.
procedure
- Open a recorded session (see Review sessions) and play it.
- To make new annotations, enter them following the procedure in Annotate
To add a remark, press Ctrl + R or click this button.

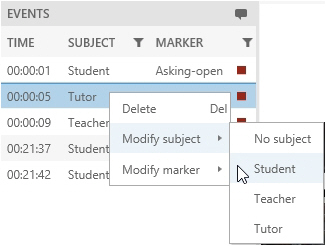
To delete a scored subject, marker or remark, right-click it in the Event Log and click Delete.
To modify a scored subject or marker, right-click it and select Modify subject, or Modify marker. Then choose the correct one.
-
To save the session before you exit it, press Ctrl + S.
-
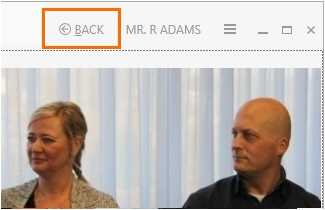
When done, choose Back. Choose Save to save new edits.

NOTE Others can view the scored markers and remarks when a recorded session is edited. To do so, open the Sessions tab and open the session. The markers and remarks appear when the person that edits the session saves it (Ctrl + S).
NOTE Scored Markers and Remarks can only be edited by the user that created the session and users that received session ownership or annotator rights.
Select another Codes list
aim
To choose another Codes list than the one that was used for scoring and annotate with that list.
IMPORTANT To choose another Codes list, you must delete all annotations from the original list first. The deleted annotations cannot be restored.
prerequisites
- Your license includes the Annotation Module.
- You created the session, received session ownership or annotator rights or are a Technician or Administrator.
procedure
- Open the session.
- Right-click the markers that were already scored in the Event Log and click Delete.
- Click this button and select another Codes list.

Change the annotator
aim
To assign the role of session annotator to another user, for instance, a colleague or one of your students.
prerequisites
- Your license includes the Annotation Module.
- You created the session or received session ownership or you are a Technician or Administrator.
procedure
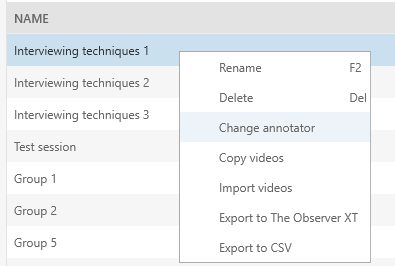
- Open the Sessions tab to view the list of all the sessions.
- Right-click the appropriate session and select Change annotator.

- From the drop-down list select the name of the person who you want to assign the role of annotator to and click OK. By default, the person who recorded the session is the annotator.

Reclaim the role of annotator
aim
To claim back the role of annotator that you gave to another user, for instance, a colleague or one of your students.
prerequisites
- Your license includes the Annotation Module.
- You created the session or you received session ownership or you are a Technician or Administrator.
procedure
- Open the Sessions tab to view the list of all the sessions.
- Right-click the appropriate session and select Change annotator.
- Select your name and click OK.
Customize the Session window
What do you want to do?
- Dock/Undock Event log or Time Line
- Dock/Undock panes and tabs
- Display a selection of events
- Collapse all subjects
Dock/Undock Event log or Time Line
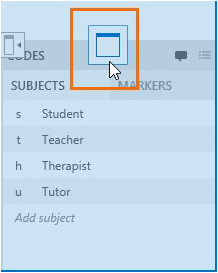
You can undock and move the Event log and Time Line window, for example to display them on a separate monitor. To dock the windows again, drag the window to the main Viso window. Docking buttons appear. Move the window to one of these docking items. A blue rectangle now shows where the window will be positioned. Release the mouse button.

Dock/Undock panes and tabs
You can undock the pane with the Events, Codes and Participant tabs, and the individual tabs. It can, for example, be useful to move the Codes tab to a separate monitor.
Docking/undocking of panes and tabs applies to Viso Viewer and is implemented for all users.
To undock a pane with its tabs
Click the title and drag it to a new position.
To dock a pane again, drag it to the main Viso window. Docking buttons appear. Move the pane to one of these docking items. A blue rectangle now shows where the pane will be positioned. Release the mouse button.
To undock a separate tab
Click the tab at the bottom of the pane and drag it to a new position.
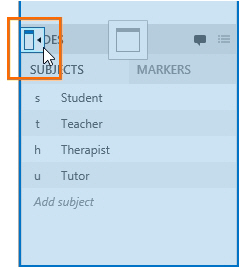
To dock the tab again, drag it to the main Viso window. Two types of docking buttons appear.
If you release the mouse button while it is positioned on the docking button shown in the figure below, it is re-docked in the pane.
If you release the mouse button while it is positioned on the docking button shown in the figure below, the separate tab is docked in the Viso window.
Display a selection of events
aim
To select a subset of events in the Event log and, optionally, in the Timeline. This can be useful to, for example, quickly display all behaviors of one subject, or a specific behavior of all subjects.
procedure
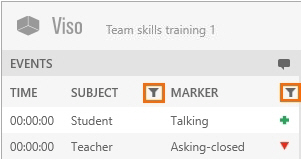
- Open the Events pane.
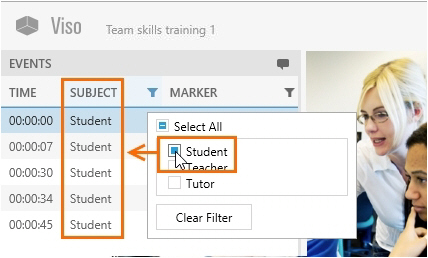
- Click the filter button next to Subject or Marker.

- Specify the selection. The result is shown in the Event log.
The filter is also applied in the Timeline.

To disable the filter in the Timeline
To see in what context the selected events took place, you may want to display all events in the Timeline, instead of only the ones specified in the Event log filter. To do so:
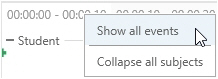
- Right-click the Timeline.
- Select Show all events.

NOTE To restore the filter in the Timeline, right-click it and select Show filtered events only.
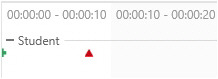
Collapse all subjects
aim
To quickly collapse all subjects in the Timeline, so that no markers are shown. You can then expand the subjects that you are interested in to view only their markers.
procedure
Right-click the Timeline and select Collapse all subjects.
NOTE To expand all collapsed subject again, right-click the Timeline and select Expand all subjects.
Export annotations to text file
aim
To export the annotations to a Comma Separated Value text file (CSV-file) so that you can analyze them in another application, like Excel.
prerequisites
- Your license includes the Annotation Module.
- You created the session, have received session ownership or are a Technician or Administrator.
procedure
- Open the Sessions tab.
- Select the sessions to export.
- Right-click one of the sessions and select Export to CSV.
- Choose a location and click Export.
NOTE The export file is named after the imported session, with the location name, and the date and time the session was created added to the filename.
Highlight videos
aim
To select specific point events of interest within sessions and create highlight videos containing these, optionally with subtitles, for further use.
prerequisites
Your license includes the Annotation Module.
The session has been recorded and you received ownership rights for the session.
procedure
- Open the Sessions tab.
- Double-click a session to open it.
- Right-click anywhere in the Timeline or click on the Export highlight video button in the top right corner of the Timeline.

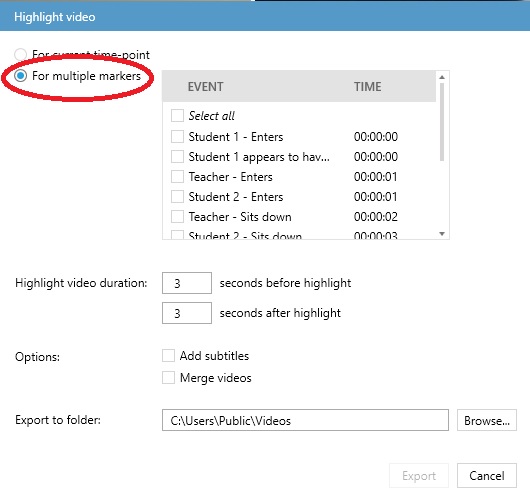
- In the Highlight video window, you have two options to select the point event(s) of the session you wish to include in your highlight video. For a single event, move the Time slider to or near to the particular point event of interest and select For current time point. Continue with Step 7.

If the point events of interest are associated with some or all of the markers you have specified in the Code list you used to annotate your session (see Create Code Lists and Annotate) select For multiple markers. Continue with Step 5.
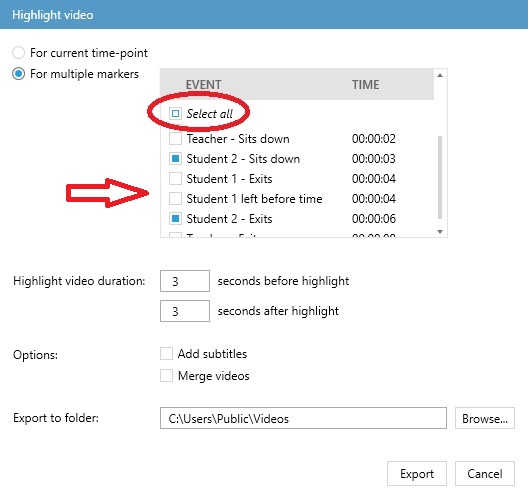
- If you have opted for For multiple markers, a window appears where you can select the point events you wish to highlight. You may select as many of these as you wish by checking the relevant boxes, or select them all using the Select all checkbox.

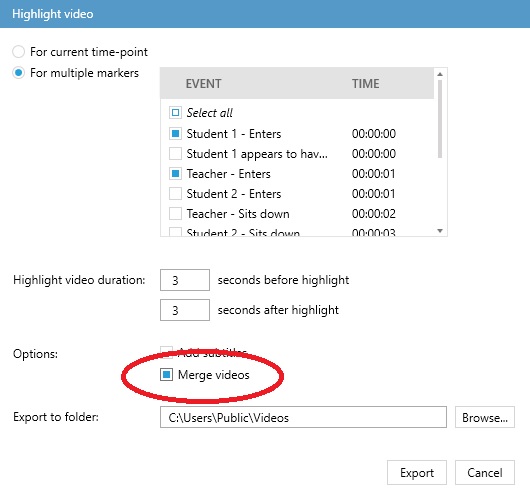
- If you wish to merge all your highlighted point events into a single video, use the Merge videos option.

- Use the Highlight video duration option to set the length of the section including the selected point event. By default, 3 seconds will be added before and after the highlighted point event, but you may adjust this value up to 30 seconds before and 30 seconds after the selected event. If you select an invalid duration, the box will be marked in red and you will not be offered the Export option.


NOTE The Highlight video duration set by you will also include the previously set Pre-roll value. (See Review sessions.)
NOTE If the Highlight video duration set by you exceeds the length of the session, the resulting Highlight video will include the highlighted event more than once, so it is recommended to set the duration shorter than the lenghth of the session.
8. If you wish to add subtitles, check the Add subtitles box at Options. 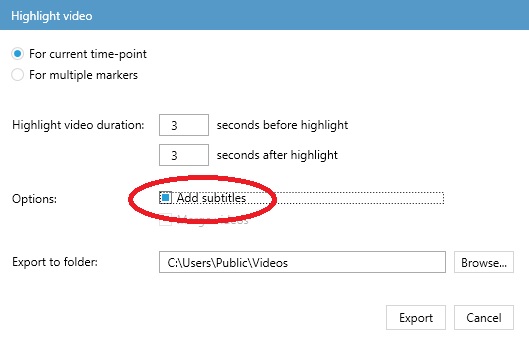 The Subtitles will comprise of the names of the highlighted Events and Subjects involved (see Create Code Lists) as well as any Remark you might have added (see Enter a remark).
IMPORTANT Your subtitles will be saved in a separate vtt file so that you can edit them later if you wish. When reviewing your Highlight video, you will need to select the relevant vtt file and turn on the subtitles. For the details, see Adding subtitles to your hightlight videos.
9. At Export to folder, select the folder where you wish to save your Highlight video. Viso offers you a default option, but you are also free to Browse.

NOTE If more than one cameras were used for recording the original session, a separate highlight video will be created for each, with the same subtitles.
NOTE Viso will create a unique default name for the highlight video for exporting which you cannot change. If you have created subtitles, the vtt file containing these will be given the same unique default name.
10. Once you have made all the necessary settings, press the Export button.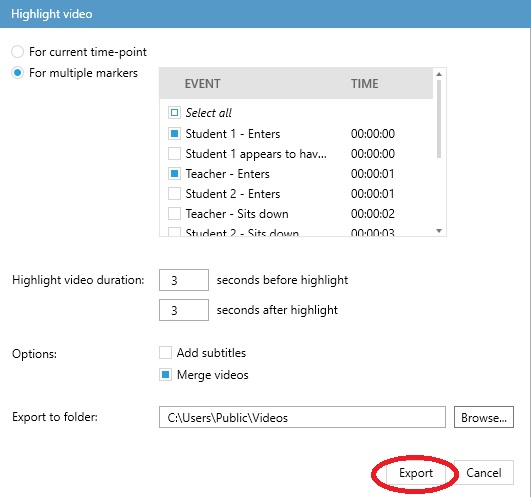
NOTE If you wish to rename the exported highlight video file, you will need to do it later, in the folder. When doing so, it is recommended to give the highlight videos and the related vtt files with the subtiles (if you created any) the same name to facilitate the easy adding of subtitles when reviewing the videos later on.
Adding subtitles to your highlight videos
As mentioned above, your highlight videos and the related subtitles will be saved in separate files. When you wish to see the subtitles while reviewing your highlight video, you will need to select the relevant vtt file containing the subtitles and enable the subtitles function.
procedure
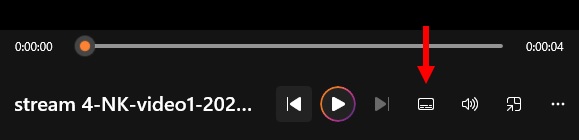
- Open your highlight video e.g. in Windows Media Player or PowerPoint.
- Look for the icon where you can set the languages and subtitles for your video.

- You will be offered a choice of selecting the subtitles from file. Select the relevant vtt file and click Open. Now the subtitles you created will be displayed under your video.
NOTE If you wish to edit your subtitles, you can do it by opening the vtt file in a text editor and make the desired changes.
IMPORTANT When you copy your highlight videos to a different folder, please remember to copy the related vtt files together with them.