# Configure the cameras
## Aim
To adjust settings in a Basler GigE camera or USB 3.0 camera, like the video frame rate, video frame resolution, and exposure time, within the camera software.
**NOTE** Settings are stored in the camera software, not on the PC. When you work with multiple cameras, repeat the procedure for each camera.
## Procedure (general)
1. Make sure MediaRecorder (and EthoVision XT, when present on the computer) is not running.
2. Start the **Basler Pylon Viewer** software that comes with the GigE cameras. [](https://bookstack.noldus.com/uploads/images/gallery/2023-12/HCxaq6pIj0cFSIWS-image.png)
**NOTE** The Basler Pylon Viewer software is installed automatically when you install the camera drivers.
3. In the **Devices** panel, under **GigE**, double-click the **Basler camera**. [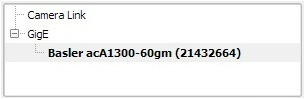`](https://bookstack.noldus.com/uploads/images/gallery/2023-12/FDHaWV9A4oBnGS3E-image.png)
4. To preview the camera image, click the **Continuous Shot** button on the toolbar. [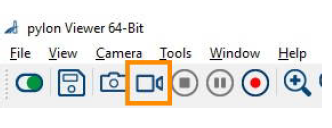](https://bookstack.noldus.com/uploads/images/gallery/2023-12/nh9KaWaNWwkFplSG-preview-camera-image.png)
**NOTE** To be able to adjust the settings, click the **Stop** button first. [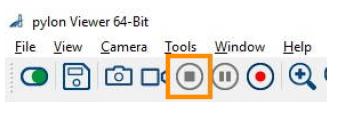](https://bookstack.noldus.com/uploads/images/gallery/2023-12/EZMozOwpKLuGnknR-adjust-settings-configure-cameras.png)
5. Follow the instructions below that apply.
## To center the camera view
With this procedure you make sure the camera view is centered.
**IMPORTANT** If you center the camera view in MediaRecorder, the settings may not be stored in the camera drivers. Here in Pylon viewer you make sure that the settings are stored in the drivers, also for future recordings.
1. In the **Features** panel, open the **Basler camera** item and then the **AOI Controls** item (**Image Format** Control for USB 3 cameras).
2. Select both options **Center X** and **Center Y.**[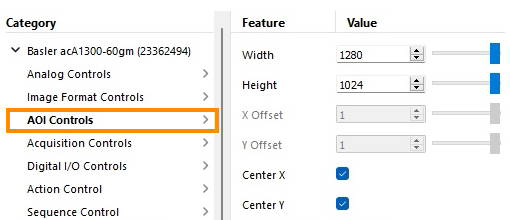](https://bookstack.noldus.com/uploads/images/gallery/2023-12/08Q3wCzg3dIDuqLs-kep.png)
3. Save the settings.
See [To save the camera settings](https://bookstack.noldus.com/link/494#bkmrk-to-save-the-camera-s)
## To set the pixel format
**NOTE** This option applies to black and white digital cameras.
1. In the **Features** panel, open the **Basler camera** item and then double-click **Image Format Controls**.
2. Set the **Pixel Format** to **Mono 8**.
3. Save the settings.
See [To save the camera settings](https://bookstack.noldus.com/link/494#bkmrk-to-save-the-camera-s)
**IMPORTANT** This corresponds to the option Y800 in MediaRecorder. In Pylon viewer you make sure that the settings are stored in the drivers, also for future recordings.
## To adjust the camera exposure time
The exposure time (or shutter time) is the time the camera shutter is kept open to let light in. The exposure time limits the maximum achievable frame rate. If the sum of the exposure time and the time needed for reading the chip (readout time) is greater than the time between consecutive video frames, the next frame may be dropped, resulting in a lower frame rate, and missed samples during tracking.
To adjust camera exposure that matches a frame rate:
1. In the **Features** panel, open the Basler camera item and then double-click **Acquisition Controls**.
2. Make sure that **Exposure mode** is **Timed**, and **Exposure Auto** is **Off**.
3. Next to **Exposure Time (Abs) \[us\]**, enter the exposure time you require, in microseconds.
For Zebrafish larvae, enter 4000 or 2000, depending on the video resolution chosen.
In all other cases, you may choose a higher value. For rodents a value below 20000 is fine. Faster animals require shorter exposure times.
Press **Tab** or click another field to confirm.
4. To check that the exposure time is compatible with your frame rate, click the **Continuous Shot** button on the toolbar. [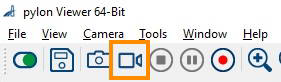](https://bookstack.noldus.com/uploads/images/gallery/2023-12/CtMW6DIFaMsQadp3-kep.png)
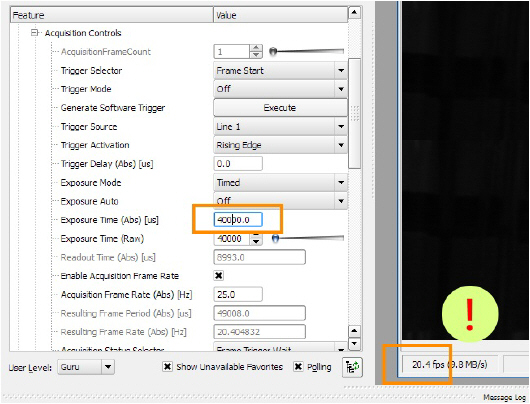
At the bottom of the live video window, locate the frame rate resulting with the new exposure time. This should be the same as the one next to **Acquisition Frame Rate (Abs) \[Hz\]**.[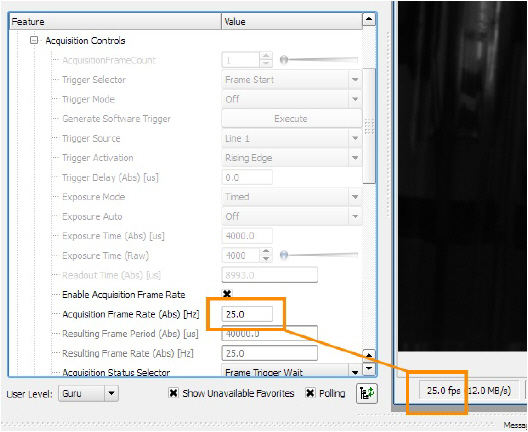](https://bookstack.noldus.com/uploads/images/gallery/2023-12/cvIKavepYRlKLgmm-image.png)If the resulting frame rate is lower than **Acquisition Frame Rate (Abs) \[Hz\]**, then either lower the exposure time (this will make the video image darker; open the lens diaphragm to compensate for this), or lower the video resolution. Do this until you see the expected frame rate.
[](https://bookstack.noldus.com/uploads/images/gallery/2023-12/2IlKX40yfG1nERmv-image.png)
5. Save the settings.
See [To save the camera settings](https://bookstack.noldus.com/link/494#bkmrk-to-save-the-camera-s)
## To adjust the camera gain
This applies to both color and black/white Basler cameras.
**IMPORTANT** Increasing gain also increase image noise. Do this only if no other option is left to improve the image brightness. For example, make sure that the lens aperture is maximal, and increase lighting.
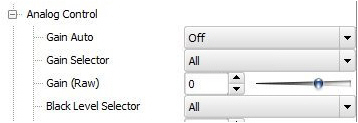
1. In the **Features** panel, click **Analog Controls**.
2. From the **Gain Auto** list, select **Off**.
3. Next to **Gain (Raw) (Gain \[dB\] for USB 3.0 cameras)**, select the value you require. A higher Gain results in a brighter image, but also more noise and a grainy image.
[](https://bookstack.noldus.com/uploads/images/gallery/2023-12/LC9KnDofaZcZADbi-image.png)
4. Save the settings.
See [To save the camera settings](#XREF_87731_To_save_the_camera)
To adjust white balance
If you have a color camera, you also need to adjust its white balance.
1. Click **Color Improvements Control**.[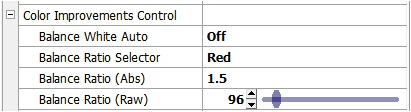](https://bookstack.noldus.com/uploads/images/gallery/2023-12/60avk6hMaNZ93pvr-image.png)
2. Point the camera at a piece of white paper, so that the camera image is entirely white. Click in the field next to **Balance White Auto** and select **Once** from the list. [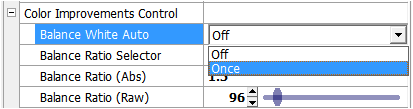](https://bookstack.noldus.com/uploads/images/gallery/2023-12/QxAWoOPeFW4E9AS4-image.png)
3. Save the settings (see below).
## To save the camera settings
1. Click the Stop button. [](https://bookstack.noldus.com/uploads/images/gallery/2023-12/HbWy2ajqqPIzvwos-image.png)
2. In the **Features** panel, open the **Configuration Sets** item (**User Set Control** for USB 3 cameras).
3. From the **Configuration Set Selector** list (**User Set Selector** for USB 3 cameras), select **User Set 1**.
4. Next to **User Set Save**, click **Execute**. The camera settings set in the previous steps are now saved under User Set 1.
5. From the **Default Startup Set** list (**User Set Default** for USB 3 cameras), select **User Set 1**.
For GigE cameras:
[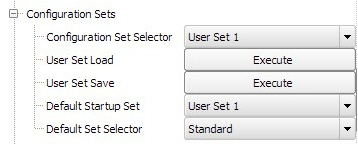](https://bookstack.noldus.com/uploads/images/gallery/2023-12/KmzthRKlZzOUotaL-image.png)
For USB 3 cameras:
[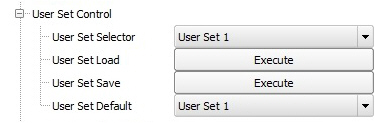](https://bookstack.noldus.com/uploads/images/gallery/2023-12/8EJ7dbxWTPGhfZ20-image.png)
6. Close Pylon Viewer.
These settings will be used each time you start up MediaRecorder.
**TIP** You can also save different settings for the same camera in User Set 2 and User Set 3. Under **Default Startup Set (User Set Default**), select which you want MediaRecorder to use.