MediaRecorder with EthoVision XT
- MediaRecorder with EthoVision XT
- First create videos in MediaRecorder and then track from video file in EthoVision XT
- Control video recording by MediaRecorder with EthoVision XT when you track live
- Adjust the video aspect ratio (analog cameras only)
MediaRecorder with EthoVision XT
How to record videos for EthoVision XT
You can create videos for use in EthoVision XT in two ways.
- First create videos in MediaRecorder and then track from video file in EthoVision XT
- Control video recording by MediaRecorder with EthoVision XT when you track live
In both cases, if you work with analog cameras, you must adjust the aspect ratio in EthoVision XT. If you work with digital cameras, this is not necessary.
See Adjust the video aspect ratio (analog cameras only)
Prevent black frames at the start of your videos
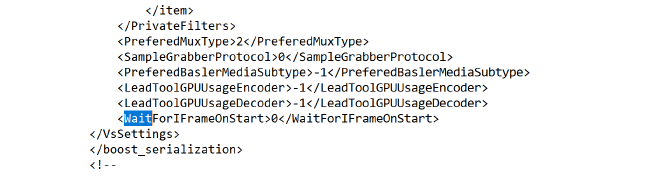
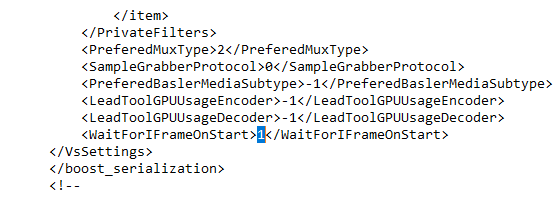
To make sure that MediaRecorder waits for an I-frame before it starts recording you can edit the VsSettings file that comes with MediaRecorder. If you do not edit this file, your video may start with black frames and EthoVision will not be able to track the video from the start.
The VsSettings file is installed together with MediaRecorder. You can find the file in C:\ProgramData\Noldus\MediaRecorder\6.
By default the ProgramData folder is a hidden folder. In Windows Explorer on the View tab select Hidden items in the Show/hide section to view the folder.
- Right-click VsSettings.xml and select Copy. Right-click and select Paste to make a copy of the file. Keep this copy in case you want to go back to the original settings.
- Open the VsSettings.xml file in Notepad or a similar text editor.
- From the Edit menu select Find and type ‘Wait’ in the search field.

- To make sure that MediaRecorder waits for an I-frame before it starts recording, edit the file and change ‘0’ into ‘1’.

- Save the file.
First create videos in MediaRecorder and then track from video file in EthoVision XT
Aim
To create videos that can be used for tracking in EthoVision XT.
Prerequisite
You have cameras that are supported for tracking in EthoVision XT.
Procedure
- Create videos in MediaRecorder.
- In EthoVision XT, select Track from video file and select the video. See the EthoVision XT Help for details.
Notes
- IMPORTANT In theory you can create video files from many different digital cameras with MediaRecorder. However, the quality of the digital camera is essential for accurate tracking. If you use other hardware or cameras than the supported ones, you need to check whether the time information in the video files is correct.
See Test an unsupported setup in Specifications
- When you use analog cameras, you must adjust the aspect ratio. For digital cameras that are not supported this may also be necessary.
See see Adjust the video aspect ratio (analog cameras only)
- Choose EthoVision as the Output Quality if you record from four cameras simultaneously. With the default settings two cameras are recorded on CPU and two on the video card (GPU). This results in differences in file size. By selecting EthoVision as the output quality, all four cameras will be recorded using CPU power. For more information see Output settings.
- Choose DanioVision as the Output Quality if you film DanioVison larvae. With this setting the compression of the video files is limited to have an optimal video quality to detect the small larvae. The file size will be larger than with the default Output Quality setting.
Control video recording by MediaRecorder with EthoVision XT when you track live
Aim
To start video recording automatically when something of interest is detected by EthoVision XT. This is, for example, useful if you have animals that spend a lot of time in a shelter. Start video recording when the animal leaves the shelter.
Prerequisites
- You have cameras that are supported for tracking in EthoVision XT.
- MediaRecorder and EthoVision XT run on the same computer.
Procedure
- In EthoVision XT, open the Trial Control screen by clicking the Trial Control Settings in the Experiment Explorer.
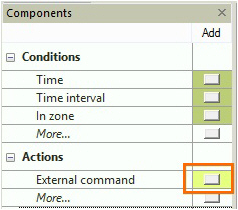
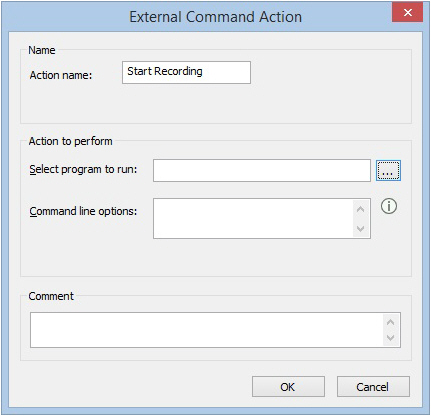
- In the Components pane, under Actions click the button next to External command.

- Enter a name in the Action Name field, for example, Start Recording.

- Under Actions to perform, click the ellipsis button
 and browse to MRCmd.exe. By default MRCmd.exe is present in the folder C:\Program Files\Noldus\MediaRecorder 6\MRCmd.exe.
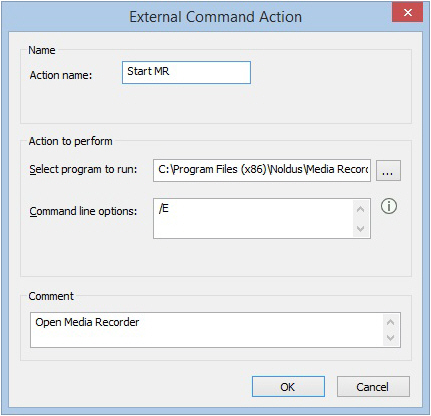
 - Enter one of the commands that are available for MediaRecorder (/E, /R, /S, /X or no command) as a Command line option.

See Use commands in Record video
Example
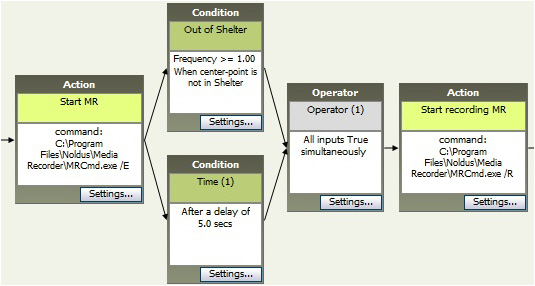
You carry out live tracking during a 24-hour period and you want to make a recording in MediaRecorder, but only when the animal leaves the shelter.
- Create an external command condition with the command /E to start MediaRecorder.

- Insert a Condition Out of shelter. Combine this condition box with a Time condition, because opening MediaRecorder takes a few seconds. With a Time condition you make sure that MediaRecorder is open before recording starts (see the figure below for an example).
- Insert an External command box with the command /R to start recording.

- Similarly, you can stop recording (Command line option: /S) when the animal enters the shelter again.
Notes
- For an extensive description of how to use Trial Control, see Trial Control in the EthoVision XT Help or the Reference Manual - Trial and Hardware Control in EthoVision XT.
- IMPORTANT Allow enough time between the actions. If a command is sent before the previous one is carried out, the second command is not carried out. For example, if the command Start Recording is sent before MediaRecorder is completely open, recording does not start.
- There also may be a delay between the issuing the Start Recording command and MediaRecorder actually starting recording. This delay results in missed frames at the beginning of the video file. Run a test recording to see how long this delay is. To assess this delay, make for example a video of a digital clock and check the interval between issuing the Start Recording command and recording the first frame of the video.
Adjust the video aspect ratio (analog cameras only)
Aim
To correct for a distorted video image in EthoVision XT.
Prerequisite
You created videos with MediaRecorder from analog cameras using the Picolo Alert PCIe Video Capture Board.
Procedure
- In EthoVision XT choose Setup > Experiment Settings.
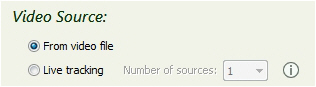
- Choose From Video File as your Video Source. You find more information on how to make Experiment Settings in Set up an Experiment in the EthoVision XT Help.

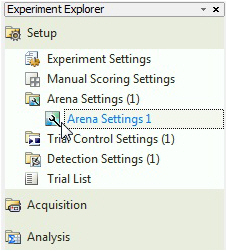
- Choose Setup > Arena settings, or click the desired Arena Settings in the Experiment Explorer.

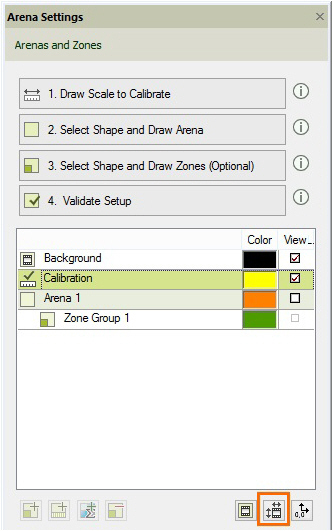
- Browse to your video file and grab a background image for your arena. See Arena Settings in the EthoVision XT Help for information on how to do this, and for more information on how to make Arena Settings.
- Click the Adjust Aspect Ratio button.

- In the Adjust Aspect Ratio window choose Noldus Recorder and click the arrow to open the list. Choose:
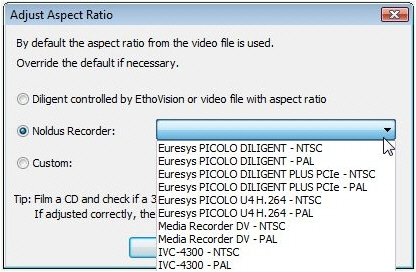
- Euresys PICOLO U4 H.264 – NTSC — For analog NTSC cameras. NTSC cameras are found in North and Central America, together with parts of Asia.
- Euresys PICOLO U4 H.264 – PAL — For analog PAL cameras. PAL cameras are found in Europe and the rest of the world, except for North and Central America, together with parts of Asia.
The other options do not apply for video files created with MediaRecorder.
Notes
- For the supported digital cameras, the default option Diligent controlled by EthoVision or video file with aspect ratio is correct.
- For not supported digital cameras you may need to adjust the aspect ratio. See the section Adjust the video aspect ratio in Arena Settings in the EthoVision XT Help for details.